Description
At Apollo NZ, we understand that every successful container pool project begins with one critical step: structural clarity. Whether you’re investing in a fully built Boann Container Pool or planning a DIY container pool installation, the process starts with a detailed structural CAD drawing—providing confidence and control before production begins.
Designed for Flexibility: Fully Built or DIY
Boann Container Pools are built with flexibility in mind, catering to a wide range of residential and commercial projects. Some clients opt for a ready-to-swim model, complete with premium features such as:
-
Integrated heating systems
-
LED lighting
-
Spa jets
-
Glass viewing panels
-
Steps and seating
Others prefer the DIY route, purchasing the structural shell to build around on-site, designing their ideal outdoor oasis from the ground up.
But whether you're going turnkey or taking on the project yourself, every Boann pool starts the same way—with a precise CAD drawing.
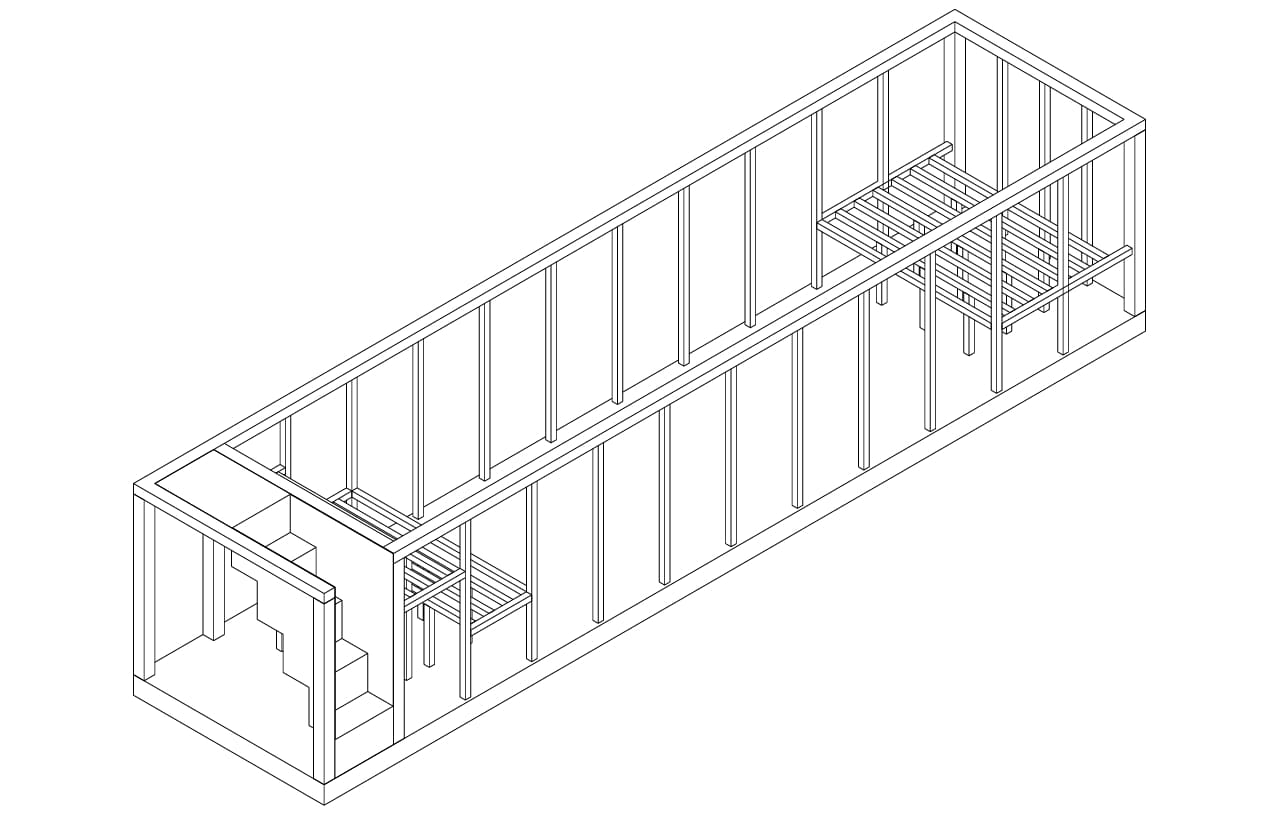
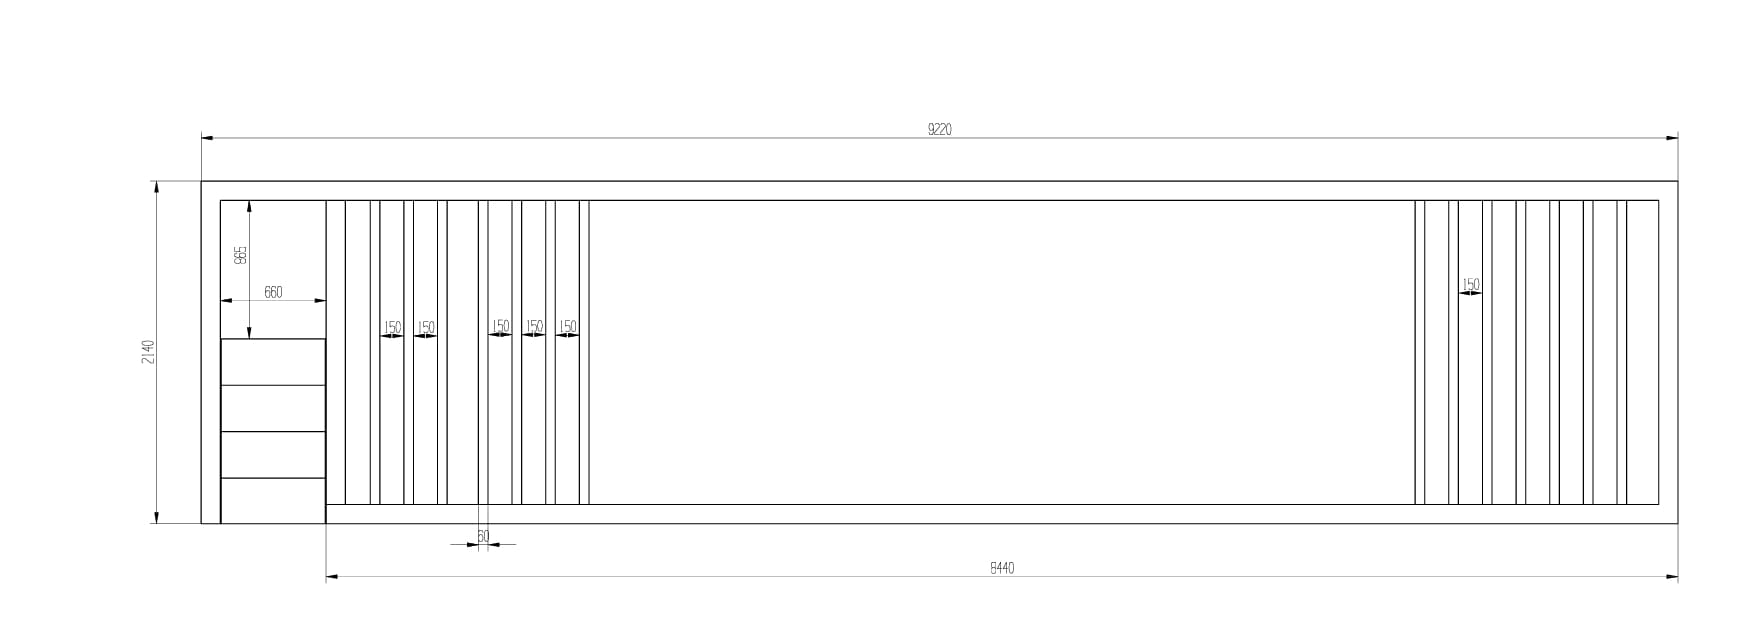
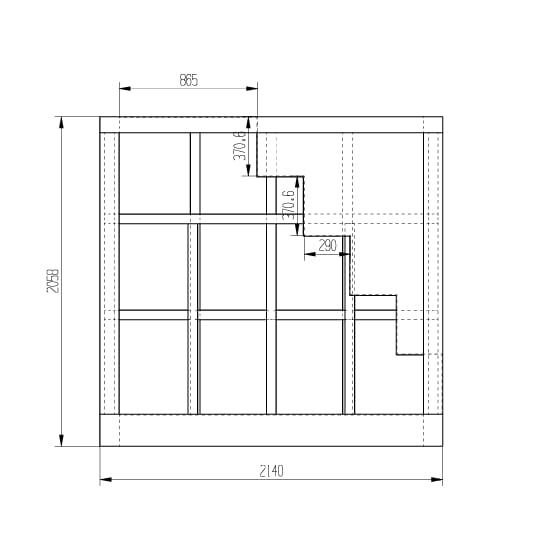
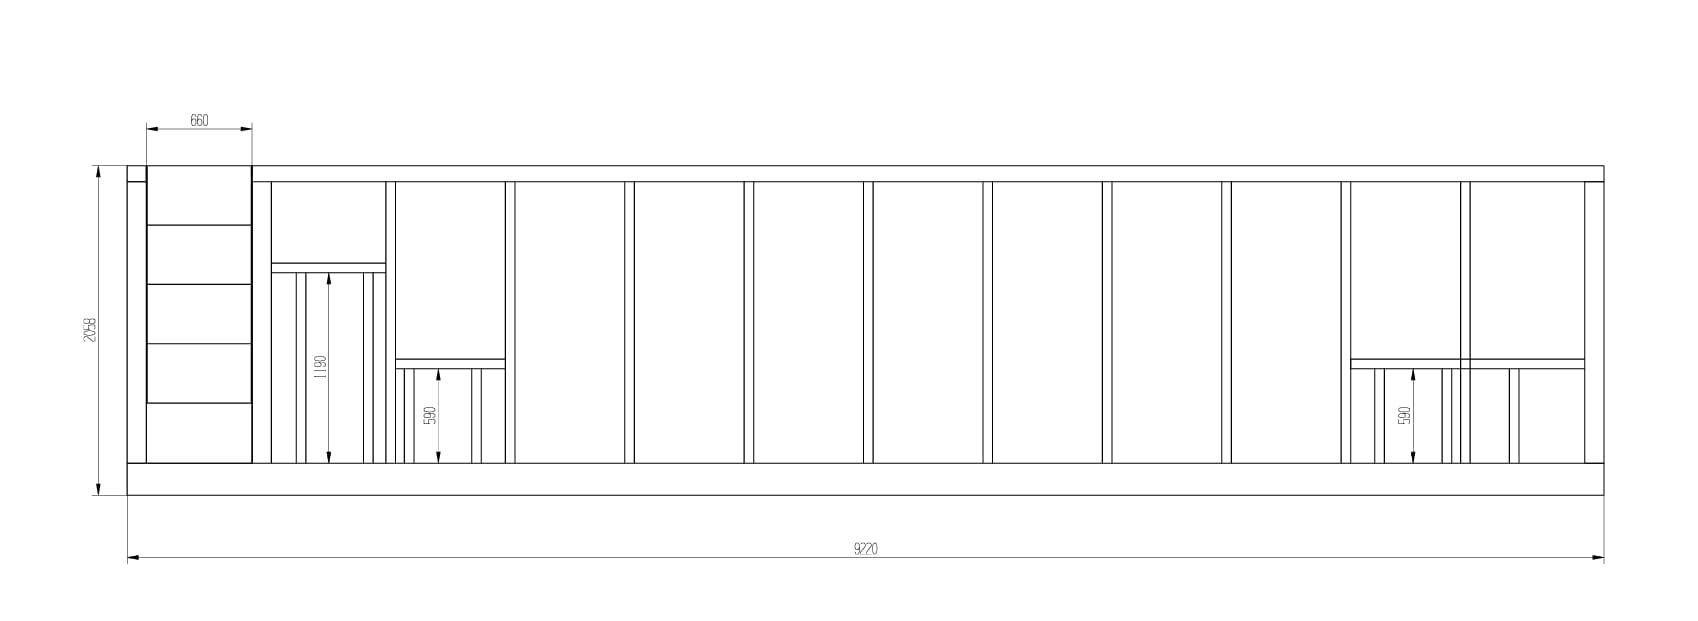
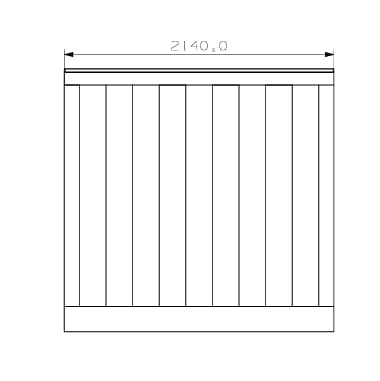
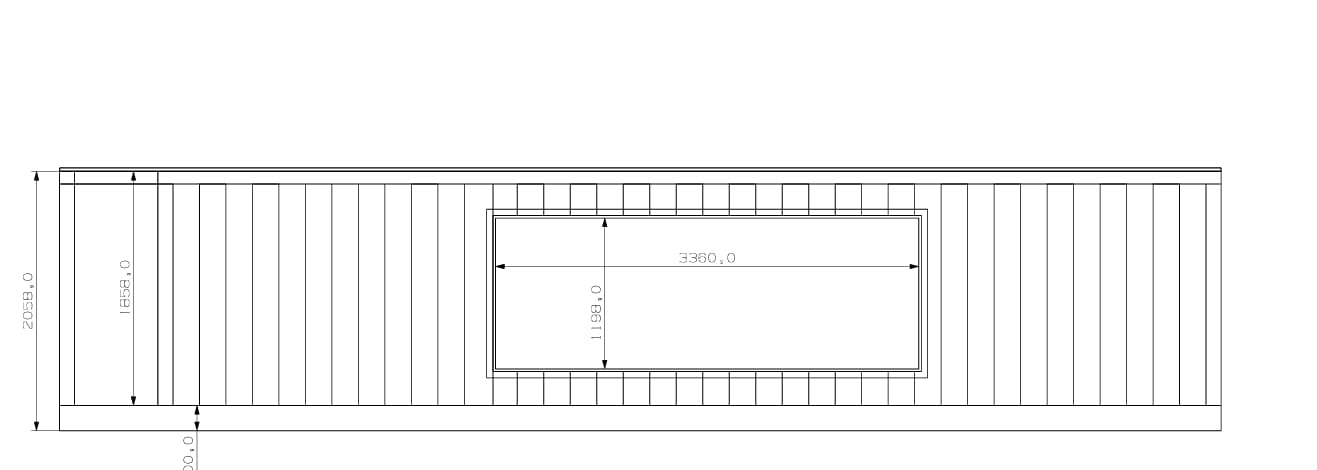
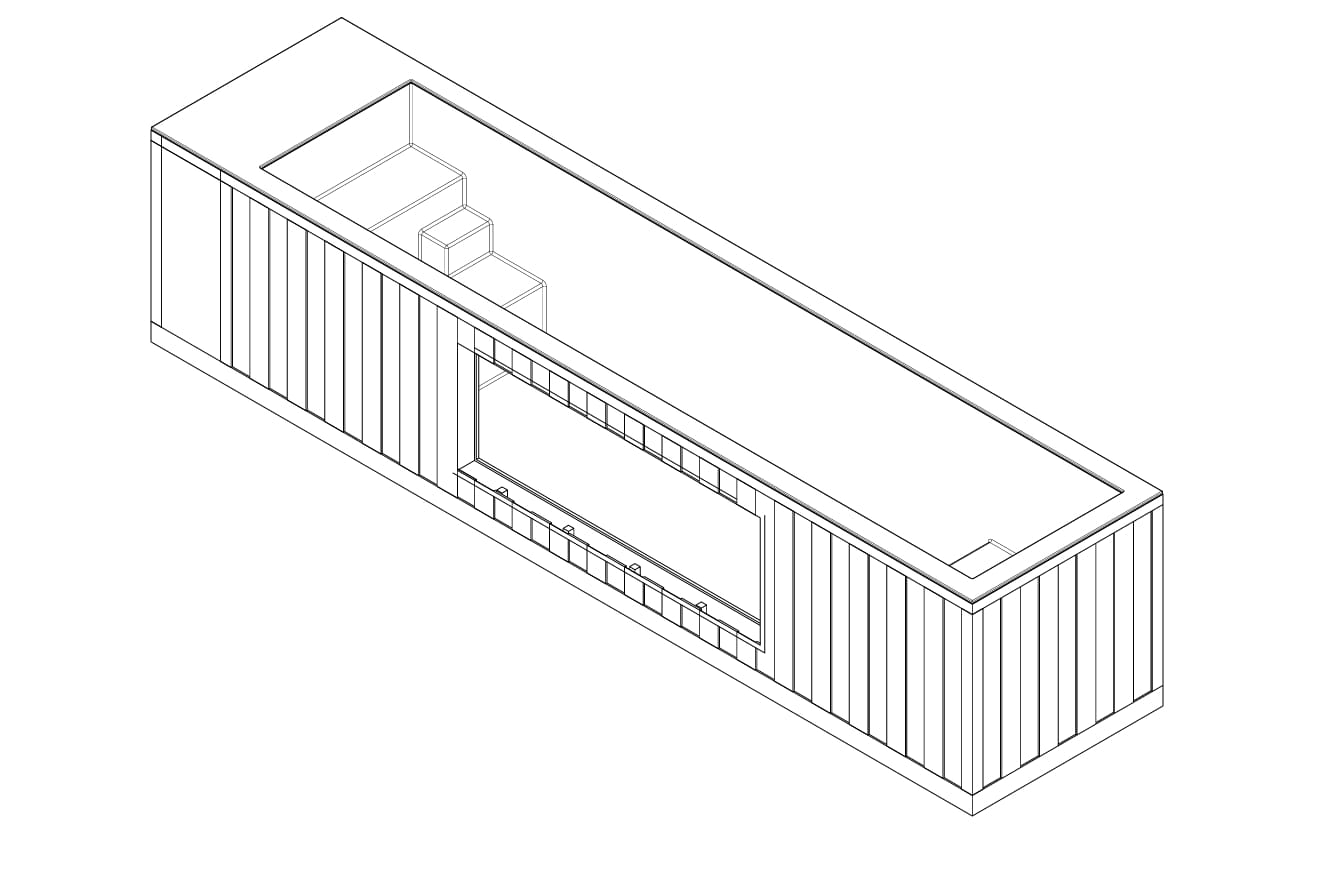
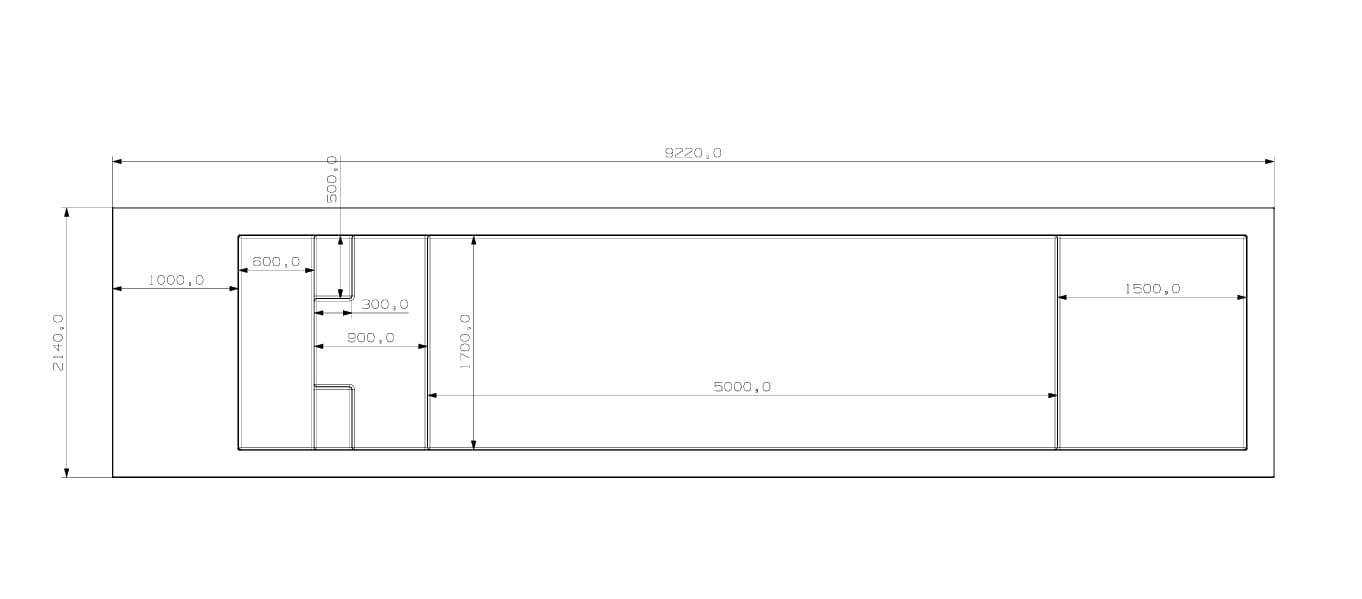
What the CAD Drawing Includes
The structural CAD drawing is more than a technical formality. It’s your project's blueprint, detailing essential elements such as:
-
Bracing and internal steel layout
-
Accurate outer dimensions
-
Window and viewing panel locations
-
Staircase and entry points (if applicable)
This early-stage document gives you a comprehensive visual of your pool’s structural frame, ensuring every step that follows is built on accuracy.
Why a CAD Drawing is Critical
Having access to your CAD drawing before production gives you a real advantage:
-
✅ Confirm final designs with confidence: Know exactly what will be delivered before fabrication begins.
-
✅ Plan your foundation accurately: Base your site prep on exact pool dimensions and reinforcement points.
-
✅ Customise with ease: Add features like staircases, benches, or viewing panels with full awareness of structural compatibility.
-
✅ Install correctly: For DIY users, the CAD file becomes a vital guide for correct placement and support.
For fully built units, the CAD file ensures nothing is missed when adding finishing touches and optional upgrades. For DIY users, it’s an indispensable installation roadmap.
Boann Container Pools – Luxury. Simplicity. Delivered.