A diy louver kit represents one of the most versatile solutions for homeowners and contractors looking to enhance outdoor living spaces, improve ventilation, or add architectural interest to residential and commercial properties. These pre-engineered systems combine precision-cut components with straightforward assembly processes, making professional-grade installations accessible to skilled DIY enthusiasts. As demand for customizable outdoor solutions continues to grow in 2026, understanding the technical specifications, installation methodologies, and design considerations becomes essential for achieving results that rival professional installations.
Understanding DIY Louver Kit Components and Materials
Modern diy louver kit systems consist of several key components designed to work together seamlessly. The primary elements include the louver blades themselves, mounting frames, hardware packages, and control mechanisms for adjustable systems.
Core Material Selection
Aluminum remains the predominant material choice for contemporary louver systems due to its exceptional strength-to-weight ratio, corrosion resistance, and minimal maintenance requirements. Powder-coated aluminum finishes provide superior durability against UV exposure and weather extremes, with color options ranging from traditional whites and blacks to contemporary bronze and custom architectural hues.
Vinyl and composite materials offer alternative solutions for budget-conscious projects or specific design requirements. These materials excel in coastal environments where salt exposure poses challenges for metal systems, though they typically provide less structural rigidity than aluminum counterparts.
Wood and wood-alternative louvers deliver natural aesthetics but demand more intensive maintenance protocols including regular sealing, staining, and inspection for moisture damage or insect activity.
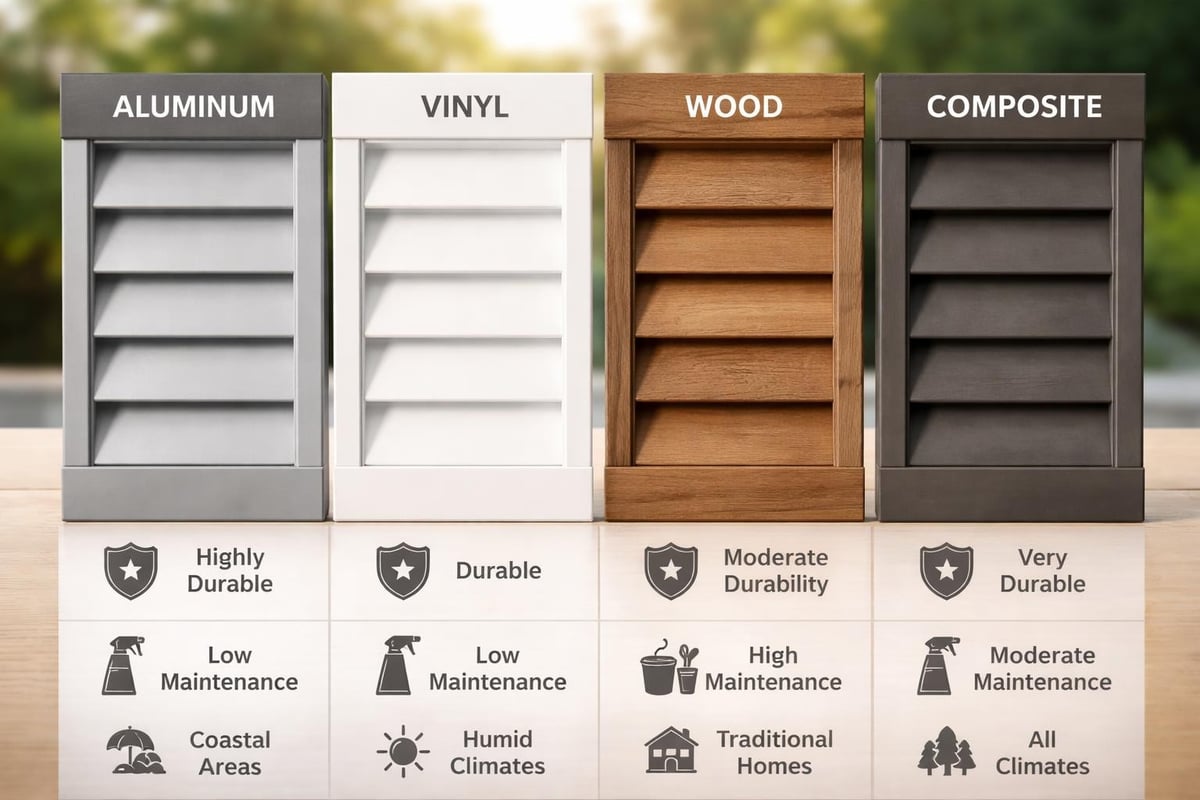
| Material Type | Durability Rating | Maintenance Level | Cost Factor | Best Applications |
|---|---|---|---|---|
| Powder-Coated Aluminum | Excellent (25+ years) | Minimal | Medium-High | All climates, commercial grade |
| Vinyl | Good (15-20 years) | Low | Low-Medium | Residential, coastal areas |
| Western Red Cedar | Fair (10-15 years) | High | High | Traditional aesthetics |
| Composite | Good (15-20 years) | Low-Medium | Medium | Residential, DIY-friendly |
Hardware and Fastening Systems
Quality hardware distinguishes professional installations from amateur projects. Stainless steel fasteners prevent rust staining and ensure long-term structural integrity. Most comprehensive diy louver kit packages include pre-sorted hardware bags with detailed component lists that simplify the assembly process and reduce installation time by up to 40% compared to sourcing individual components.
Planning Your DIY Louver Installation Project
Successful louver installations begin long before the first component arrives on site. Proper planning addresses structural requirements, dimensional accuracy, and regulatory compliance.
Site Assessment and Measurements
Accurate dimensional planning prevents costly errors and material waste. Start by measuring the installation area multiple times, confirming measurements from different angles to account for structural irregularities. The FLEXfence dimension guide and calculator provides valuable tools for determining exact material requirements based on your specific project parameters.
Critical measurement points include:
- Overall span width and projection depth
- Ceiling or mounting surface height variations
- Existing structural member locations
- Drainage slope requirements (minimum 1/4 inch per foot)
- Clearance zones for operable blade systems
Structural Support Requirements
Most diy louver kit systems require substantial structural support, particularly for roof-mounted applications. Typical aluminum louver systems exert loads ranging from 15 to 30 pounds per square foot when accounting for dead load, wind resistance, and potential snow accumulation in applicable climates.
Mounting surfaces must provide adequate load-bearing capacity through connection to structural framing members. Ledger boards should be a minimum 2x8 pressure-treated lumber secured with appropriate lag bolts or structural screws at 16-inch intervals. Understanding proper louver installation techniques ensures your foundation meets engineering standards.
Step-by-Step Installation Process
The installation sequence for a diy louver kit follows a logical progression that builds structural integrity while maintaining accurate alignment throughout the process. While specific steps vary by manufacturer and system type, the fundamental approach remains consistent across quality products.
Foundation and Frame Installation
Begin by establishing level reference lines using laser levels or traditional string-line methods. Install the primary support beam or ledger board first, ensuring perfect level across the entire span. This initial step determines the quality of your entire installation, as subsequent components reference this baseline.
- Mark and drill pilot holes for ledger board mounting
- Install flashing tape or membrane to prevent water intrusion
- Secure ledger board with appropriate fasteners at specified intervals
- Verify level in both directions using precision measuring tools
- Install support posts or columns with proper footings and concrete anchors
- Connect beam structure and verify square using diagonal measurements
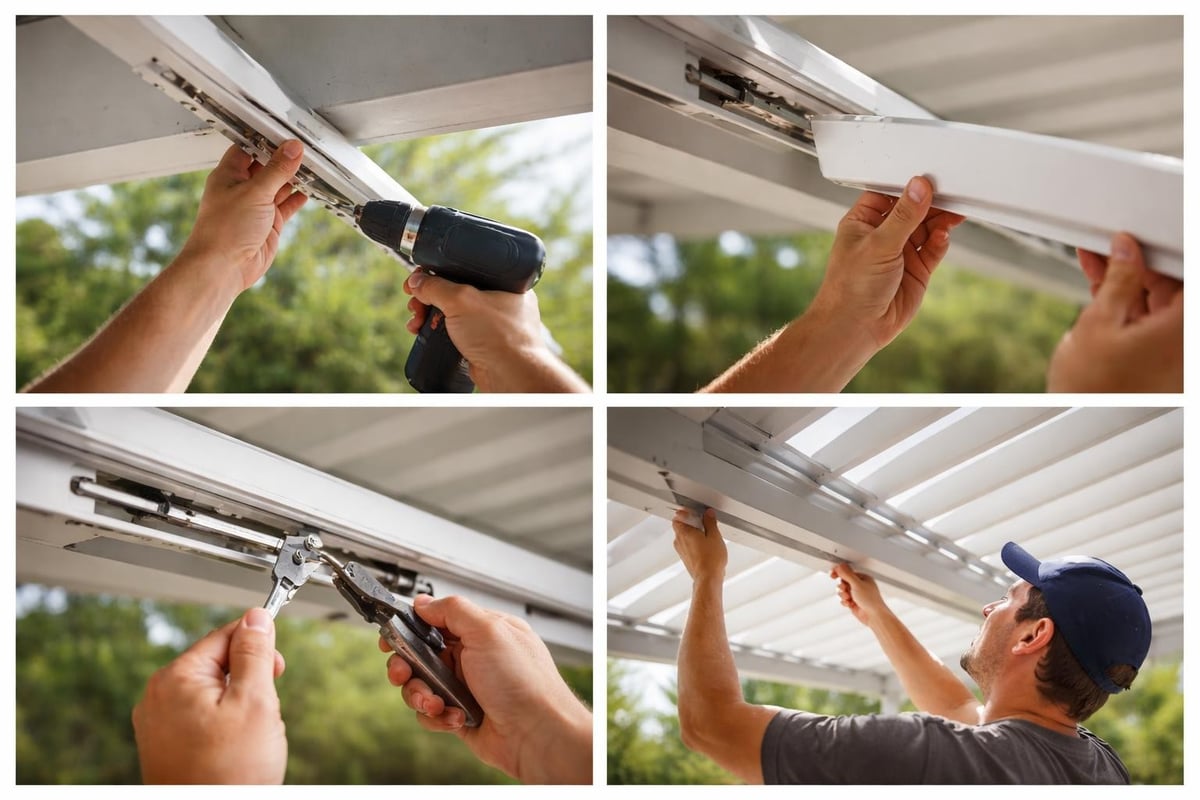
Blade and Track Assembly
Once the structural framework achieves proper alignment, blade installation proceeds systematically. Modern systems typically feature pre-engineered blade carriers that slide into aluminum tracks, simplifying what was historically a time-intensive process.
Installation sequence:
- Install perimeter framing members and verify dimensions
- Mount blade carrier tracks with consistent spacing
- Insert individual louver blades into carrier mechanisms
- Connect control linkages for operable systems
- Test blade operation through full range of motion
- Install end caps and trim pieces
Common pitfalls during this phase include forcing misaligned components rather than identifying and correcting the root cause, over-tightening fasteners that bind moving parts, and failing to verify smooth operation before completing installation. Resources like avoiding common DIY louver installation mistakes provide valuable guidance for first-time installers.
Customization Options and Design Considerations
A quality diy louver kit offers extensive customization possibilities that allow you to create solutions perfectly tailored to your specific requirements. Understanding available options helps you specify systems that deliver both functional performance and aesthetic appeal.
Blade Orientation and Spacing
Louver blade orientation significantly impacts both visual appearance and functional performance. Horizontal blade configurations provide classic aesthetics and efficient water drainage, while vertical orientations create contemporary visual statements and excel in wind-prone environments.
Blade spacing affects light transmission, privacy levels, and visual weight. Tighter spacing (3 to 4 inches) maximizes privacy and weather protection but reduces airflow and light penetration. Wider spacing (6 to 8 inches) creates airier aesthetics with enhanced ventilation but sacrifices weather protection.
Operable Versus Fixed Systems
Fixed louver systems offer simplicity and lower initial costs, ideal for applications where consistent shade angles and ventilation patterns meet year-round requirements. These systems excel in covered walkways, mechanical equipment screening, and architectural accent applications.
Operable systems provide dynamic environmental control, allowing users to adjust blade angles throughout the day or season. Manual crank mechanisms offer reliable operation at modest cost, while motorized systems with remote or smartphone controls deliver premium convenience. For those seeking maximum flexibility, Lourve fixed size kitsets provide standardized dimensions that simplify planning while maintaining quality construction and competitive pricing.
Color Selection and Finish Options
Contemporary powder-coating technology delivers exceptional color durability and breadth of choice. Standard architectural colors include bright white, black, bronze, and various gray tones that complement modern design palettes. Custom color matching enables precise coordination with existing structures, though minimum order quantities may apply.
Popular finish combinations:
- Contrasting frames and blades for visual definition
- Monochromatic schemes for seamless integration
- Wood-grain powder coatings that replicate natural materials without maintenance requirements
- Dual-sided finishes with different interior and exterior colors
Integration with Existing Structures
Successfully incorporating a diy louver kit into existing architectural elements requires careful attention to transitions, weather sealing, and structural connections. The visual and functional success of your installation depends heavily on how well new components integrate with established surfaces and systems.
Attachment Methods for Various Substrates
Different mounting surfaces demand specific fastening approaches and hardware selections. Masonry and concrete surfaces require appropriate anchoring systems rated for pullout resistance in your specific application. Wood framing accepts standard lag screws or structural screws when properly sized and installed into solid bearing surfaces.
Steel structures necessitate either welding brackets or through-bolt connections with backup plates to distribute loads across larger surface areas. Aluminum-to-aluminum connections should incorporate isolation gaskets to prevent galvanic corrosion where dissimilar alloys contact each other.
Waterproofing and Flashing Details
Proper weather protection at the intersection between louver systems and existing structures prevents water intrusion that leads to deterioration and interior damage. Self-adhering membrane flashings create reliable barriers when installed with proper overlap sequences that direct water away from vulnerable areas.
| Connection Type | Flashing Method | Sealant Requirement | Critical Details |
|---|---|---|---|
| Wall-Mounted Ledger | Adhesive membrane + Z-flashing | Polyurethane or silicone | Lap over existing weather barrier |
| Roof Penetration | Step flashing integration | High-grade polyurethane | Coordinate with roofing membrane |
| Soffit Connection | Continuous drip edge | Minimal - mechanical seal | Maintain ventilation gaps |
| Column Interface | Sleeve flashing | Silicone or butyl tape | Allow for thermal movement |
The guidance available through resources like assembling DIY shutters applies equally to louver installations, emphasizing the importance of systematic approaches and attention to weatherproofing details.
Operational Systems and Controls
For adjustable diy louver kit installations, the control system represents the interface between user and environmental management. Selecting appropriate control mechanisms balances convenience, reliability, and budget considerations.
Manual Control Mechanisms
Hand-crank systems provide direct mechanical control without electrical requirements or potential electronic failures. Quality gear mechanisms translate rotational input into smooth blade rotation across the entire louver field. These systems work effectively for installations up to approximately 150 square feet, beyond which the mechanical advantage required makes operation increasingly difficult.
Rod-and-linkage systems connect individual louver sections through mechanical linkages that maintain synchronized operation. Proper installation requires precise alignment and regular lubrication to prevent binding or uneven blade angles.
Motorized and Automated Options
Electric actuators eliminate manual effort while enabling remote operation and integration with home automation systems. Contemporary motors feature obstacle detection, programmable positioning, and weather-responsive automation that adjusts blade angles based on sun position, temperature, or precipitation.
Key motorization considerations:
- Power requirements and electrical access
- Control interface preferences (wall switch, remote, smartphone app)
- Integration with existing home automation platforms
- Battery backup for power outage operation
- Wind speed sensors for automatic closure during storms
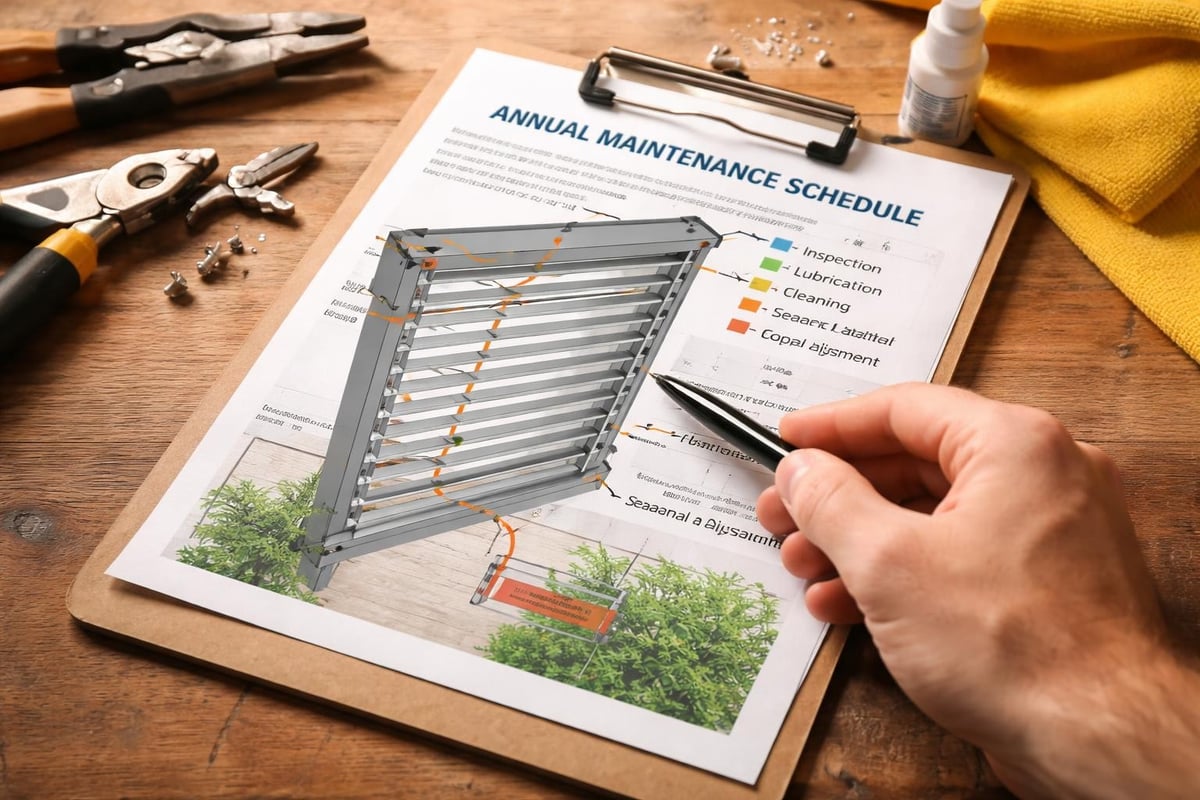
Maintenance and Long-Term Performance
A properly installed diy louver kit requires minimal ongoing maintenance, but systematic care extends service life and preserves aesthetic quality. Establishing regular maintenance protocols prevents minor issues from developing into costly repairs.
Routine Cleaning Procedures
Aluminum louver systems benefit from periodic washing with mild detergent solutions that remove accumulated dust, pollen, and environmental pollutants. Avoid abrasive cleaners or harsh chemicals that damage powder-coat finishes. Most installations require only annual cleaning, though high-dust environments or installations near roadways may benefit from more frequent attention.
Moving components require periodic lubrication using silicone-based products that resist dust accumulation and temperature extremes. Inspect control linkages annually for wear, loose connections, or binding that indicates misalignment.
Inspection and Adjustment Protocols
Annual inspections should evaluate:
- Fastener tightness at all critical connections
- Blade alignment and smooth operation through full range
- Weather seal integrity at structure interfaces
- Drainage path functionality and debris removal
- Finish condition and touch-up requirements
- Motor operation and control responsiveness (if applicable)
Seasonal adjustments optimize performance as environmental conditions change. Pre-winter inspections in cold climates verify that drainage systems remain clear and blade mechanisms operate smoothly despite temperature changes. Spring maintenance addresses any winter damage and prepares systems for heavy-use summer months.
Cost Analysis and Budget Planning
Understanding the complete financial picture for a diy louver kit project enables informed decisions and prevents budget overruns. While material costs represent the most obvious expense, comprehensive planning addresses hidden costs and long-term value propositions.
Direct Material Costs
Entry-level diy louver kit systems for basic pergola applications start around $15 to $25 per square foot for materials only. Mid-range systems with enhanced durability and finish options typically range from $30 to $50 per square foot. Premium motorized systems with architectural-grade finishes and sophisticated controls can exceed $75 per square foot before installation labor.
Cost factors include:
- System size and complexity
- Material selection and finish quality
- Fixed versus operable blade mechanisms
- Manual versus motorized operation
- Customization and special engineering requirements
Installation Labor and Equipment
DIY installation eliminates professional labor costs that typically add $20 to $40 per square foot to project budgets, representing potential savings of 30% to 50% on total project costs. However, tool requirements may necessitate equipment purchases or rentals including laser levels, impact drivers, circular saws, and potentially scaffolding or lift equipment for elevated installations.
Time investment varies significantly based on experience level and project complexity. First-time installers should budget approximately three to four times the manufacturer's estimated installation time to account for the learning curve and inevitable adjustments. Resources like creating louvered doors demonstrate that systematic approaches and patience yield professional results even for novice builders.
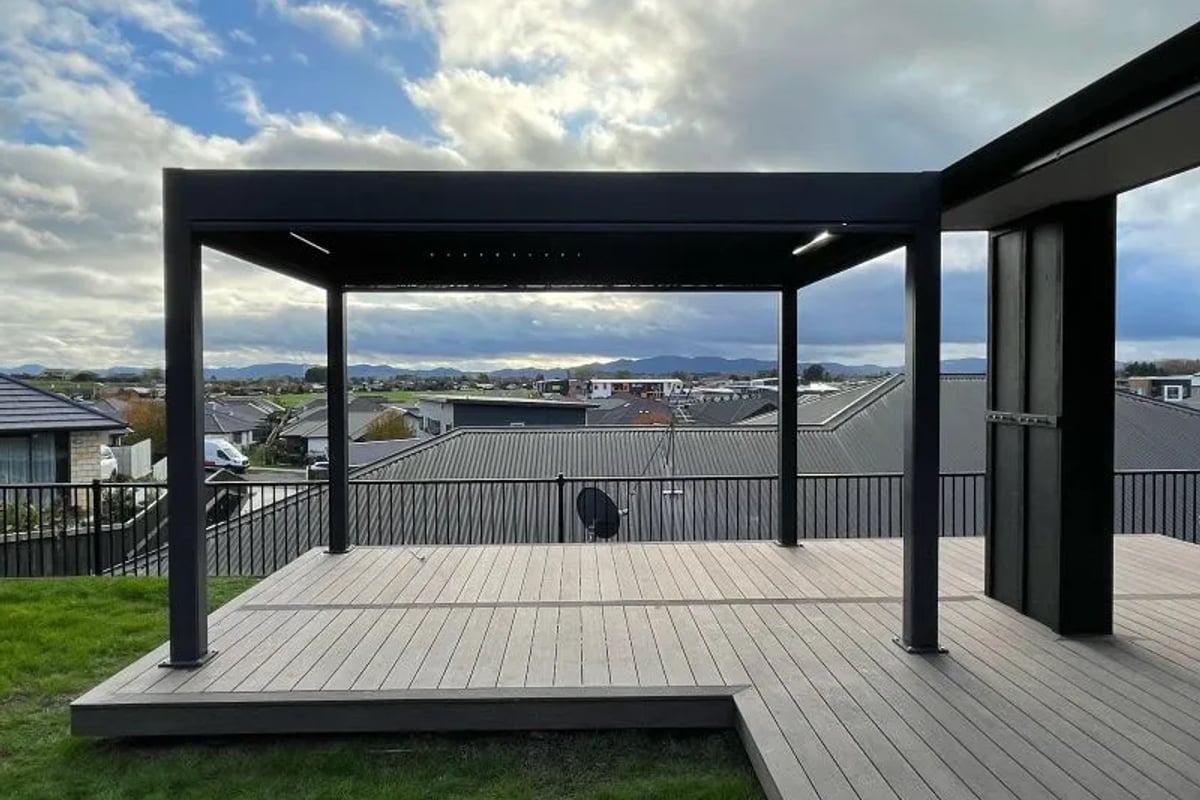
Advanced Applications and Creative Uses
Beyond traditional patio cover and pergola applications, a diy louver kit enables innovative solutions for diverse functional and aesthetic challenges. Creative thinking extends the value of modular louver systems across residential and light commercial applications.
Privacy Screening and Windbreaks
Vertical louver installations create effective privacy barriers that maintain airflow while blocking sightlines. Angling blades to specific orientations balances privacy requirements with natural ventilation, particularly valuable in urban environments where properties sit in close proximity.
Wind mitigation represents another effective application, with properly oriented louver systems reducing wind speeds by 40% to 60% while avoiding the complete blockage that creates turbulent downdrafts. This makes outdoor spaces more comfortable during windy conditions without creating wind tunnel effects.
Architectural Accents and Aesthetic Features
Louver systems function as three-dimensional architectural elements that add depth, shadow play, and visual interest to otherwise plain surfaces. Incorporating louvers as decorative screens, equipment enclosures, or transition elements between indoor and outdoor spaces creates sophisticated design statements.
Combining louver orientations, blade spacing variations, and color contrasts enables custom patterns and visual effects impossible with traditional solid construction. These applications particularly suit contemporary architectural styles that emphasize geometric patterns and light-shadow interactions.
Implementing a diy louver kit successfully requires careful planning, quality materials, and systematic installation practices that ensure both immediate performance and long-term durability. Whether you're creating shade structures, privacy screens, or architectural accents, understanding component selection, proper installation techniques, and ongoing maintenance requirements positions your project for success. Apollo NZ provides wholesale direct pricing on comprehensive louver systems and design solutions that deliver professional-grade results for DIY enthusiasts and contractors worldwide, backed by technical support and global shipping capabilities that make premium outdoor living solutions accessible regardless of your location.
Article written using RankPill.