
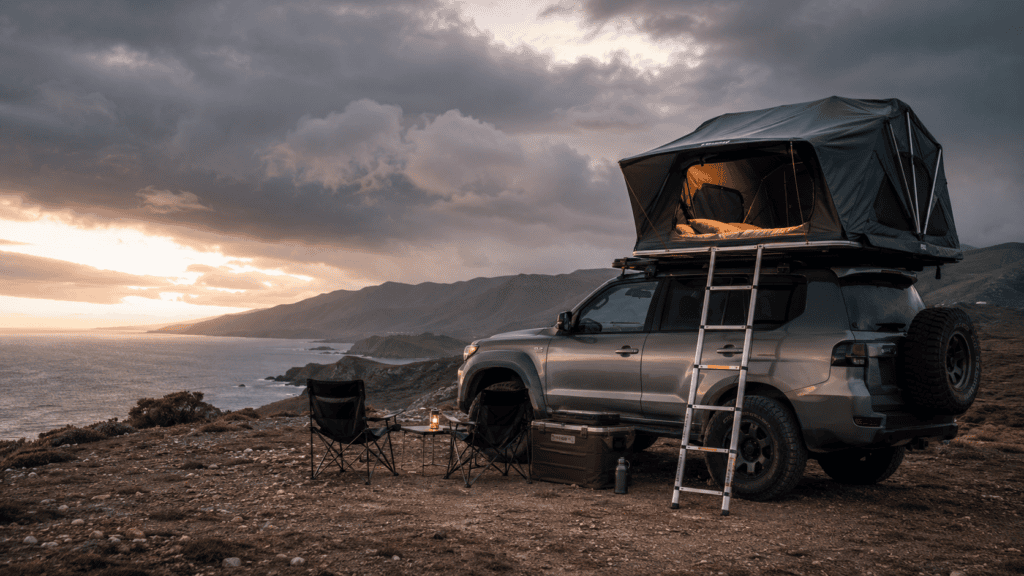
Rooftop camping offers a practical middle ground between travelling with a ground tent and investing in a campervan or motorhome. A rooftop tent can turn an everyday SUV, ute or compatible car into a compact touring setup while allowing the vehicle to remain useful for normal driving.
However, a rooftop tent should never be treated as a standalone accessory. The vehicle roof, roof rack, mounting hardware, tent, ladder, occupants and camping equipment all form one connected system. The lowest-rated part of that system determines what the complete setup can safely support.
One of the biggest advantages of rooftop camping is convenience. Many rooftop tents can be opened within minutes, with bedding remaining inside between campsites.
Sleeping above the ground can also help avoid damp soil, stones, mud and minor surface irregularities. The vehicle becomes the sleeping platform, making it easier to create a reasonably level bed when travelling through varied terrain.
Rooftop camping is particularly well suited to:
It is less suitable for travellers who have difficulty climbing ladders, need a large indoor living area or regularly drive away from camp during the day. Once the rooftop tent has been opened, it generally needs to be packed down before the vehicle can move.
The best rooftop tent is not necessarily the largest or most expensive option. It is the lightest and simplest tent that comfortably meets the needs of the vehicle, travellers and intended journeys.
Before comparing individual models, establish five basic requirements:
Remember that the tent price is only part of the total cost. Roof racks, mounting hardware, mattress upgrades, anti-condensation layers, awnings, lighting and storage equipment can add significantly to the final setup.
Hard-shell tents close into a rigid case. They are generally quicker to open and close, provide good protection for the tent fabric and often have a lower profile when packed.
They can be a good option for travellers who move frequently and want a simple camp routine.
Possible disadvantages include higher purchase prices, greater weight and a sleeping area that is usually limited by the closed dimensions of the shell.
Soft-shell tents normally fold open beyond the side or rear of the vehicle. This allows them to provide a larger mattress while using a relatively compact roof footprint.
They are often less expensive and may offer annex rooms or sheltered ladder entrances.
The trade-off is a longer setup process. Covers, straps, poles and fabric may need to be managed each time the tent is opened or packed away. This can become more noticeable in rain, cold weather or strong wind.
Roof loading is one of the most important parts of rooftop-tent planning.
The vehicle’s dynamic roof-load rating applies while the vehicle is moving. It must include the combined weight of the tent, roof rack, mounting brackets and anything else carried on the roof.
A parked vehicle creates a different loading condition because the tent may also support occupants, bedding and equipment. This is sometimes described as the static load, although vehicle manufacturers do not always publish a separate static rating.
A static limit should never be guessed by multiplying the dynamic rating.
Consider a vehicle with a 75 kg dynamic roof limit. A 68 kg rooftop tent may appear suitable, but once a 6 kg rack and 3 kg of mounting hardware are included, the total becomes 77 kg. The vehicle’s roof limit has already been exceeded.
A rack rated to 100 kg does not increase the vehicle’s 75 kg roof capacity.
A rooftop tent is connected to the vehicle through several components:
Tent base → mounting hardware → crossbars or platform → rack feet or brackets → vehicle roof structure
Every part must be compatible and correctly rated.
The tent manufacturer may specify:
Fasteners should be tightened to the specified torque rather than simply tightened as much as possible. Too little torque can allow movement, while excessive tightening can deform rails, crush mounting channels or damage the tent base.
After installation, take a short drive on smooth roads and inspect the complete setup. Check the rack feet, mounting clamps, tent position and fasteners again after the first longer journey and after travelling on rough roads.
Clicking, clunking, shifting or metallic rubbing noises should be investigated immediately.
A rooftop tent changes more than the vehicle’s weight. It also increases its overall height.
Measure the vehicle with the tent fully closed and all roof accessories installed. Keep the measurement somewhere visible to the driver.
Allow additional clearance around:
Never rely entirely on a clearance sign when the margin is small.
A calm, consistent setup routine is safer and usually faster than rushing.
Before opening the tent, inspect the campsite carefully. Look for:
Position the vehicle so it is stable and reasonably level. The ladder should have firm footing and should not extend into a roadway, cooking area or frequently used walking path.
A practical setup sequence is:
Park and secure the vehicle → inspect the site → level the vehicle → release the tent → deploy and lock the ladder → fit support poles → open ventilation → arrange bedding → establish the cooking area
Using the same order each time makes it less likely that an important step will be forgotten.
The ladder may support both the occupants and, depending on the tent design, part of the extended tent floor.
It should be:
Do not place the ladder on boxes, timber, rocks or improvised supports. Reposition the vehicle or use a manufacturer-approved ladder extension.
Keep both hands available when climbing. Bedding, bags and bulky equipment should be passed up separately.
Condensation is frequently mistaken for a leaking tent.
People release moisture while sleeping. When warm, damp air touches cold fabric, the tent shell or the floor, water can form inside even when it has not been raining.
The most effective control is regular airflow.
Open vents or windows on opposite sides of the tent and avoid pushing bedding directly against cold walls. An anti-condensation mat beneath the mattress can create an air gap that allows moisture to escape.
After a wet night, inspect the underside of the mattress as well as the visible fabric.
When a tent must be packed away wet, reopen it at the first practical opportunity. Dry the fabric, mattress, folds and under-mattress layer thoroughly before long-term storage.
An open rooftop tent presents a large surface to the wind. Gusts can place significant pressure on the fabric, hinges, gas struts, support poles, roof rack and vehicle suspension.
Where the design permits, position the lower or hinged end of the tent toward the prevailing wind.
Close the tent and seek alternative shelter when:
A campsite booking is never a reason to remain in unsafe conditions.
A rooftop tent raises the vehicle’s centre of gravity. Heavy roof-mounted accessories increase body roll and reduce the margin available during sudden steering, emergency braking and steep side slopes.
Store dense equipment low and close to the centre of the vehicle wherever practical. This includes:
One litre of water weighs approximately one kilogram, so even a modest water supply can add substantial mass.
The vehicle must remain within its overall gross mass, axle-load and tyre limits—not only its roof rating.
Cooking should take place away from the tent fabric, vehicle body and dry vegetation. Never cook inside a rooftop tent.
Position the kitchen so people do not need to pass through the cooking area to reach the ladder. Keep fuel upright, restrained and away from heat.
For electrical equipment, start with a simple energy budget. List each appliance, its power consumption and the expected operating time.
A weekend setup might only need a portable power station, headlamps and phone charging. Longer journeys may justify a dedicated battery, solar charging and a properly protected electrical system.
Batteries should be restrained, terminals protected and cables kept away from heat, water, hinges and sharp edges.
It is easy to add awnings, boxes, showers, solar panels, tools, ladders and recovery accessories to a touring vehicle. Every addition also brings more weight, wind resistance, fastening points and maintenance requirements.
Prioritise equipment that solves a recurring problem.
A reliable rooftop camping setup should be easy to inspect, simple to operate and comfortable enough to repeat night after night. When the tent, rack, vehicle and camping routine are planned as one system, rooftop camping can provide an enjoyable and flexible way to explore coastal roads, mountain regions and remote landscapes around the world.
A great book that covers a lot of information is: The Rooftop Camping Handbook: Choosing, Fitting and Travelling with a Rooftop Tent
You can find this on Amazon:


