DIY Louvre Kitset 101: A Beginner’s Guide to Mastering Your Outdoor Space

March 25, 2026
Spread the love

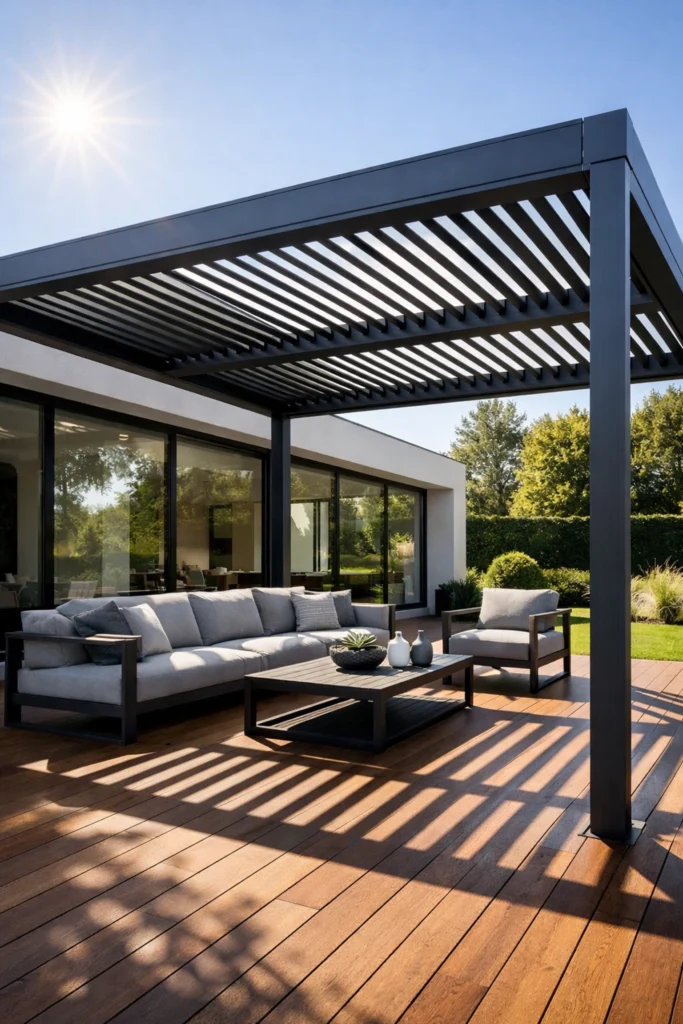
Creating a functional, high-end outdoor living area is no longer reserved for those with massive renovation budgets or a team of specialized contractors. The rise of the DIY Louvre Kitset has revolutionized the way homeowners and builders approach outdoor design. By choosing a professional-grade aluminum system that is engineered for straightforward assembly, you can achieve a sophisticated architectural finish at a fraction of the cost.

This guide provides a technical overview of how to select, plan, and install a louvre kitset to ensure long-term durability and aesthetic appeal.

The Shift Toward Professional-Grade DIY

In the past, "DIY" often implied a compromise in quality. However, the current market offers professional-grade aluminum louvres specifically designed for the owner-installer. These systems utilize the same high-specification materials found in commercial installations, such as 6063-T5 architectural-grade aluminum and stainless steel components.

The primary advantage of a DIY Louvre Kitset is the ability to access wholesale direct pricing. By opting for a supply-only model, you eliminate the overhead costs associated with full-service installation companies. This makes it a viable solution for both homeowners looking to add value to their property and builders seeking a reliable, high-quality product for their clients.

Why Choose a Louvre Kitset Over Traditional Roofing?

Traditional fixed roofs or pergolas offer permanent shade, but they lack versatility. A louvre system provides dynamic control over your environment:

  • Climate Regulation: Open the blades to allow sunlight and warmth during winter; close them for total shade and UV protection during summer.
  • Ventilation: Angled blades encourage airflow, preventing heat from becoming trapped under the structure.
  • Weather Protection: When fully closed, interlocking blade designs provide a watertight seal, effectively creating an outdoor room that can be used year-round.
  • Aesthetic Integration: Sleek, powder-coated finishes complement modern New Zealand architecture far better than traditional timber or corrugated iron.

For those looking at specific structural requirements, especially in high-wind zones, ensuring your kitset is PS1 certified for structural design is essential for compliance and safety.

Phase 1: Planning and Site Assessment

Success in any DIY project is 90% preparation. Before ordering your kit, you must conduct a thorough site assessment.

Precise Measurements

Do not rely on "rough estimates." Measure the intended installation area at least three times.

  • Span and Projection: Determine the width (along the house or support beam) and the projection (how far out it extends).
  • Height Clearance: Ensure the structure sits high enough to clear doors and windows, but low enough to provide effective shade.
  • Leveling: Check the ground or mounting surface for level. Even a slight slope can affect the operation of the moving blades.

Structural Mounting

Identify where the structure will be anchored. If mounting to an existing wall, you must locate the internal studs or structural members. If the kit is free-standing, you will need to plan for concrete footings or secure deck mounting.

Tools Required for Installation

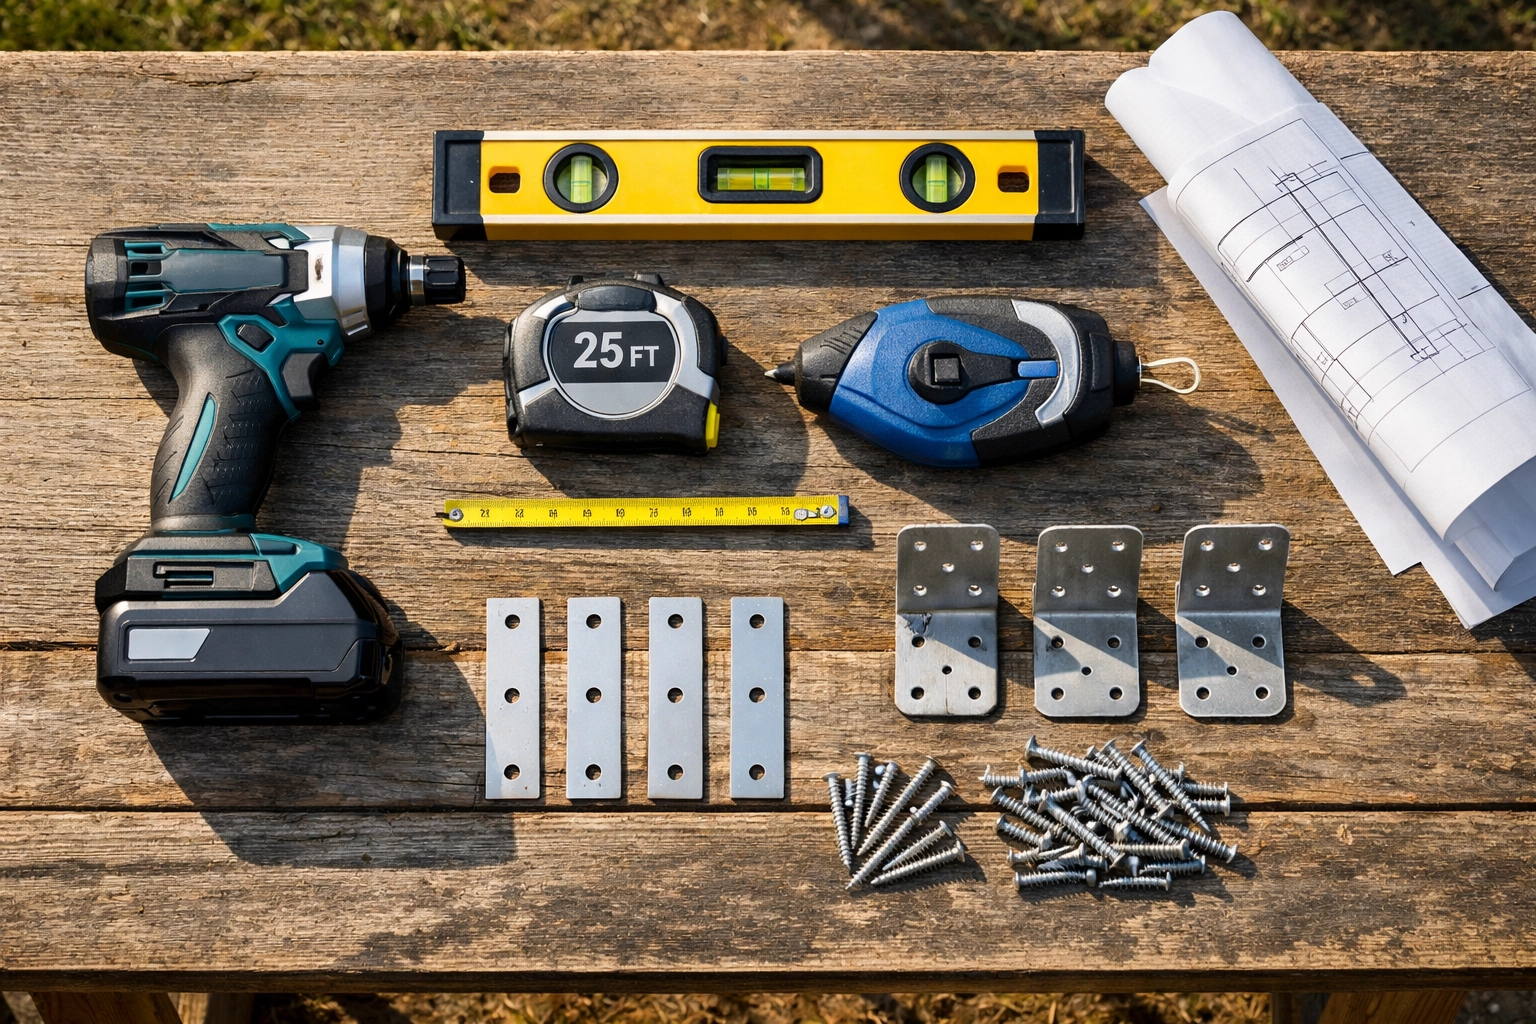
A standard DIY Louvre Kitset is designed for assembly with common power tools. Ensure you have the following ready:

  • High-quality cordless drill and impact driver.
  • Level (laser levels are highly recommended for larger spans).
  • Metric socket set and hex keys.
  • Measuring tape and chalk line.
  • Ladder or scaffolding depending on the height.
  • Sealant (neutral cure silicone) for gutter joints.
Essential tools and blueprints laid out for a professional DIY louvre kitset installation project.

Phase 2: Understanding the Components

A professional kitset typically arrives in several key sections. Familiarizing yourself with these before you begin will speed up the assembly process.

  1. The Frame: This includes the primary beams and gutters. Modern systems often integrate the guttering into the frame for a seamless look.
  2. The Posts: These support the weight and often house the internal drainage systems.
  3. The Blades: The louvres themselves, which are usually hollow-core aluminum for strength and weight efficiency.
  4. The Operating Mechanism: Depending on your choice, this could be a manual crank or a motorized system with a remote control. For those looking for versatility, the Cerberus Plus system offers both manual and motorized options.

Phase 3: The Step-by-Step Installation Process

While every kitset has specific nuances, the general workflow follows a logical sequence to maintain structural integrity.

Step 1: Setting the Perimeter

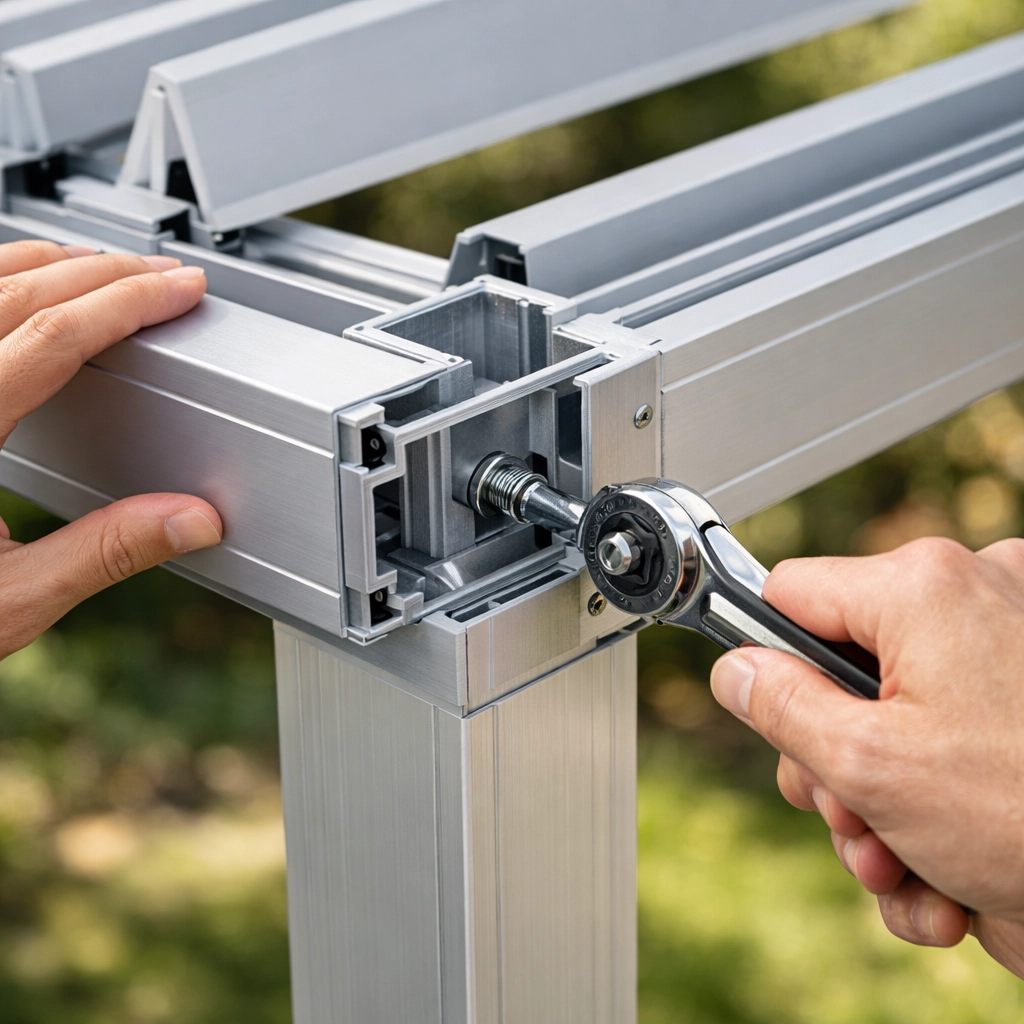
Start by marking out your post locations and mounting the wall ledger (if applicable). Ensure the frame is perfectly square. Tip: Use the 3-4-5 triangle method or measure the diagonals; if the diagonal measurements are identical, your frame is square.

Step 2: Assembling the Frame

Assemble the perimeter beams and gutters. Ensure all joints are sealed correctly with professional-grade sealant to prevent leaks. Secure the frame to the posts or wall mounts. At this stage, verify that the structure is level across all planes.

Step 3: Installing the Blade Support System

Install the tracking or pivot pins that will hold the louvre blades. It is vital to ensure these are aligned perfectly on both sides. If they are slightly offset, the blades may bind or fail to close properly.

Step 4: Blade Placement

Insert the louvre blades into the frame. This is often the most rewarding part of the build as the structure begins to take its final shape. Work from one end to the other, checking the movement of every fifth blade to ensure there is no friction.

Step 5: Integrating the Control System

If you have a manual system, install the gearbox and handle. For motorized versions, you will need to mount the motor and run the cabling. Important: While the assembly is DIY, any permanent electrical wiring must be completed by a registered electrician to meet New Zealand safety standards.

Close-up of hands assembling a professional-grade aluminum louvre frame corner joint during DIY installation.

Customization and Flexibility

One of the greatest benefits of the DIY Louvre Kitset model is the "supply-only" flexibility. You aren't limited to a one-size-fits-all solution.

  • Integrated Lighting: Many professional kits allow for the integration of LED strips within the frame.
  • Side Protection: You can easily add outdoor blinds or shutters later to provide wind protection and privacy.
  • Wholesale Direct Access: Buying direct allows you to allocate more budget toward higher-quality finishes or larger dimensions that might otherwise be unaffordable through a retail installer.

Avoiding Common Installation Mistakes

To achieve a professional result, avoid these common pitfalls:

  • Ignoring Drainage: Ensure the structure has a slight fall toward the downpipes. Water must be able to exit the internal gutter system efficiently.
  • Over-tightening Fasteners: Aluminum is durable but can be stripped if you apply too much torque with an impact driver. Set your drill clutch appropriately.
  • Skipping the Sealant: Even the best-engineered joints require sealant in coastal or high-rainfall environments to ensure 100% water tightness.
  • Working Alone: While many parts of the process are manageable, lifting the main beams and inserting the blades is much safer and faster with two people.
Raindrops beading on black waterproof aluminum louvre blades with an integrated gutter for outdoor protection.

Long-Term Maintenance for Aluminum Louvres

Aluminum louvres are favored for their low-maintenance properties, especially compared to timber pergolas that require staining or painting every few years. To keep your kitset in peak condition:

  • Regular Cleaning: Wash the frame and blades with a soft brush and mild detergent every 6 months to remove salt spray and dust.
  • Gutter Clearance: Periodically check the internal gutters for leaves or debris to prevent blockages.
  • Lubrication: Apply a dry silicone spray to moving pivot points once a year to ensure smooth, quiet operation.

Summary of Key Takeaways

  • ✔️ Cost Efficiency: Utilizing a DIY Louvre Kitset provides access to professional-grade materials at wholesale direct pricing.
  • ✔️ Structural Integrity: Prioritize aluminum systems with PS1 certification for long-term safety and performance.
  • ✔️ Precision Planning: Accurate measurements and a square frame are the foundations of a successful installation.
  • ✔️ Versatility: Supply-only options allow homeowners and builders to customize outdoor spaces without the constraints of full-service contracts.
  • ✔️ Control: Louvres provide the ultimate balance of shade, light, and ventilation control, significantly increasing the usability of any outdoor area.

By following a systematic approach to planning and assembly, any competent DIY enthusiast can master their outdoor space with a louvre system that looks, feels, and performs like a professional architectural installation.

Return to insights

Charities We Support

cart
30 foot containers. fresh offer plaza online shopping store for great products. : moving heavy equipment through natural landscapes like west virginia’s can have environmental implications.