
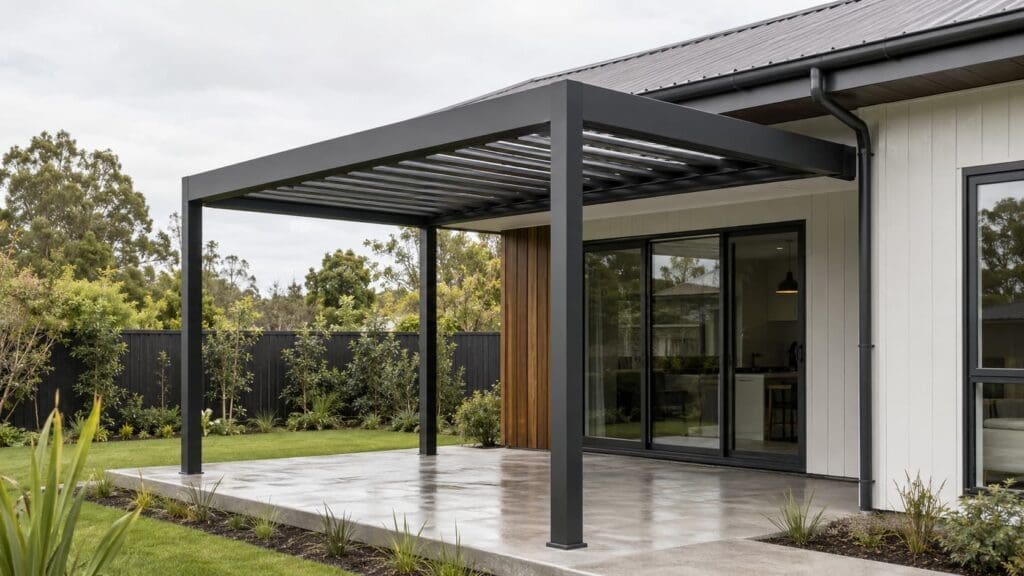
A successful outdoor project is not determined by the product alone. It also depends on how that product connects with the house, deck, foundations, drainage, electrical supply and surrounding outdoor features.
These connection points are known as project interfaces.
An aluminium pergola may be manufactured to the correct dimensions, but problems can still arise if a gutter obstructs the wall connection, the concrete is unsuitable for fixing posts, or electrical cables have not been positioned before installation begins.
Understanding these interfaces early helps avoid unexpected alterations, delays and additional costs.
This guide covers the main points homeowners, builders, designers and installers should consider when planning an outdoor living project.
An interface is any point where one part of the project meets another.
For example:
Each component may be supplied by a different company or completed by a different trade. The interface is where their responsibilities overlap.
The more complex the project, the more important it becomes to define these connection points before manufacturing or installation begins.
| Interface | What needs to be checked |
|---|---|
| Existing house | Structure, cladding, soffits, fascia, gutters and fixing access |
| Foundations | Ground conditions, concrete quality, footing positions and post loads |
| Drainage | Water direction, downpipes, stormwater connections and surface falls |
| Electrical | Motor locations, power supply, lighting, sensors and control systems |
| Outdoor blinds | Opening dimensions, tracks, cassette space and wind exposure |
| Glass and shutters | Frame tolerances, support, floor levels and operating clearance |
| Decking and paving | Finished levels, movement, fixing access and post penetrations |
| Outdoor kitchens | Ventilation, heat separation, plumbing, gas and electrical services |
| Delivery and assembly | Site access, unloading space, storage and lifting requirements |
One of the most common planning mistakes is looking at each product separately.
A pergola might be ordered first, followed later by outdoor blinds, glass doors, heaters or an outdoor kitchen. However, these additions can require specific beam sizes, post positions, clearances or electrical preparation.
Before confirming a structure, consider what the completed outdoor area may eventually include:
Not every feature needs to be installed immediately. However, identifying possible future additions can allow the main structure to be configured appropriately from the beginning.
For example, adding blinds later is much easier when the pergola openings are square, the posts are correctly positioned and enough space has been left for the blind cassette and side tracks.
The first major decision is whether the outdoor structure will be freestanding or connected to an existing building.
A freestanding pergola is supported by its own posts and foundations. This can reduce the number of direct connections with the house, but it still needs to coordinate with:
A freestanding system can be positioned close to the house without necessarily relying on the house for structural support.
A wall-mounted pergola introduces a more complicated interface. The installer must determine where and how the structure can be securely attached.
The visible fascia, soffit or exterior cladding should not automatically be treated as a structural fixing point. The supporting structure behind the exterior surface must be assessed.
The wall interface may involve:
A site inspection by the installer or appropriate building professional is particularly important for attached structures.
Measuring the length and width of a patio is only the beginning.
Outdoor projects must be considered in three dimensions. Heights, obstructions and changes in level can be just as important as the overall footprint.
Measurements should identify:
Measurements should be taken at several points. Existing houses, decks and concrete areas are not always perfectly square or level.
The manufacturing dimensions of a kitset should be based on verified site measurements rather than an approximate property plan.
Pergola posts transfer the loads from the roof into the supporting surface and foundations below.
The visible surface does not necessarily indicate what is underneath it.
An existing concrete patio may appear suitable, but the installer may still need to establish:
Thin decorative concrete may not provide the same fixing conditions as a purpose-built footing.
Fixing a post only to deck boards is generally not enough. The supporting joists, bearers or dedicated foundations below the deck must be considered.
The interface may require:
Post positions should ideally be confirmed before the deck is completed.
Pavers and outdoor tiles are finished surfaces, not necessarily structural foundations.
Where posts are installed through these surfaces, the project may require:
Coordinating the pergola installer and paving contractor can create a much cleaner result.
Many modern louvre and fixed-roof pergolas use internal gutters and post drainage. Water is collected at roof level and directed through selected columns.
However, moving water through the post is only part of the solution. The project must also determine where the water goes after it reaches ground level.
Drainage planning should consider:
Water should not simply be directed toward the house, an entrance, a neighbouring property or an area where it can pool.
The pergola supplier can provide product-specific drainage information, but the final site drainage solution may involve the installer, builder, drainlayer or landscaper.
This interface should be agreed before posts are fixed or the surrounding surfaces are completed.
Motorised louvre roofs, retractable roofs and outdoor blinds require electrical planning.
Depending on the product, electrical components may include:
The control unit and power supply need to be positioned where they are protected, accessible and suitable for the product.
Electrical planning should establish:
Electrical preparation is much easier before walls, decking, paving and pergola trims are completed.
Any fixed electrical work should be completed by a suitably qualified electrician.
Outdoor blinds are often added to improve shade, privacy, wind control and general comfort. However, the pergola opening must be suitable for the blind system.
Important considerations include:
Track-guided blinds require suitable surfaces on both sides of the opening. Uneven posts, decorative trim or insufficient fixing width can complicate installation.
The opening should also be measured after the main structure is installed whenever practical. This allows the blind to be manufactured to the finished dimensions rather than the theoretical dimensions.
Solid PVC and mesh fabrics behave differently in wind.
Clear PVC creates a relatively solid surface, so wind pressure acts across most of the blind. Mesh fabrics allow some air to move through the material, reducing the pressure applied to the surface.
This does not mean that any outdoor blind can remain down in every weather condition. Site exposure, blind size, fabric choice and system rating all matter. Blinds should be raised when winds exceed the operating conditions recommended for the particular system.
For exposed areas, systems such as Titan outdoor blinds can provide heavy-duty track guidance and a wide choice of mesh openness levels. The exact blind configuration should still be selected according to the site and opening size.
Glass doors, shutters and fixed wall panels can turn an open pergola into a more sheltered outdoor room.
These additions introduce several new interfaces:
It is important to decide whether blinds and glass are intended to occupy the same opening. Both may require tracks, headroom and side fixing space.
The floor also needs to be sufficiently level for sliding or folding systems to operate correctly.
Where the pergola and house move independently, rigid infill systems may require appropriate tolerances or connection details. These should be confirmed by the relevant supplier and installer.
The installation sequence can significantly affect the finished appearance.
For example, installing paving before finalising post positions can result in base plates sitting awkwardly across tile joints. Completing decking too early may make it difficult to add structural support beneath the posts.
The project team should agree on:
A difference of only a few centimetres can affect blind height, door clearance, post cover details and drainage.
An outdoor kitchen is not simply a piece of furniture placed beneath a pergola. It can involve heat, smoke, plumbing, gas, electricity and ventilation.
The layout should consider:
The kitchen should not obstruct pergola drainage outlets, blind tracks or access to electrical control equipment.
Outdoor heaters also require suitable clearance from roof components, blinds, wiring and other materials. The heater manufacturer’s installation requirements should be checked before determining the final location.
For a supply-only kitset project, responsibilities should be clearly understood from the beginning.
These responsibilities may vary between projects, so they should be confirmed before ordering.
Large outdoor systems are commonly delivered in long, heavy crates or multiple packages.
Before dispatch, the project should consider:
A delivery vehicle may be able to reach the property entrance but not the backyard. Long beams may also be difficult to move through narrow side paths, garages or internal spaces.
Crated shipping helps protect kitset components and keeps related parts together, but an unloading and handling plan is still needed.
A well-organised project will generally follow this sequence:
The exact sequence will vary, but the key principle remains the same: hidden structural and service requirements should be resolved before decorative finishing work is completed.
The visible fascia may not provide a suitable structural connection. The supporting building structure needs to be assessed.
Small discrepancies can become significant when fitting a structure between walls, beneath gutters or around existing landscaping.
The thickness, reinforcing and edge distances may still need to be checked.
Internal post drainage still needs a planned discharge or stormwater connection.
Cables and control equipment are easier to conceal when included in the initial design.
This can produce awkward cuts, damaged tiles or poorly positioned base plates.
Track-guided blinds perform best when the supporting opening is square and properly aligned.
Glass, shutters, blinds and outdoor kitchens can all influence the original pergola configuration.
Before placing an order, it is useful to confirm:
If these questions cannot yet be answered, it may be too early to confirm the final manufacturing dimensions.
The best outdoor projects are planned as complete systems.
The pergola, deck, house, drainage, electrical supply, blinds, glass and landscaping should not be treated as unrelated components. Every connection affects the next part of the project.
A little more coordination before ordering can prevent significant work later. It can also produce cleaner detailing, better-performing accessories and an outdoor area that looks intentional rather than assembled in stages.


